Monday, January 31, 2011

Petite Poppies

0 comments
poppiebatikThis quilt was inspired by the poppies that grow in my garden.
It could soon grace your walls. Bid now.

Batik Poppies©2009 16″ x 20″ (Fabric; Island Batiks and my hand dyes, machine quilted with Superior Rayon Thread)
 
Bidding ends tomorrow evening, February 1st.

Fabric to Dye For

1 comments
And the winner is… Ta Ta Ta DA

Marcia Kosturock of Denton, Tx
 

IMG_0827-1 My husband Brett and George pulled the final winner of the month.
Marcia will receive a copy of my book Fabric to Dye For. I know Marcia that you will have fun trying the projects in the book. Remember to dye with a friend :)
 

And for those of you who didn’t win, well you can always order the book!

Testimonials  from former students who took my dye class.
Frieda's class was a blast! Her "formula" for dying is so simple and just plain fun.  Dying with the "buddy system" made it so much less scary. I'm looking forward to dying fabric in my own backyard this summer. Thanks, Frieda.
Shelby in Nashville TN
For certain kinds of fun, there just are no words to describe how much Frieda and her dye class are in that category.  If class had lasted a month, I’d be wishing for two more months.  One thing continues to crack me up but didn’t happen until days after class.  While folding clothes, I came across a pair of what should be white panties that were anything but.  An array of gorgeous, vibrant colors on them, right around where my belly button would be.  It took me a few breathless moments to determine whether I needed to stop right now and get checked for a major medical malfunction!  They were obviously the ones I wore to class, having leaned a little too close to my project on numerous occasions.  Okay, it’s not everyone’s idea of a souvenir of great times, but now when I wear them, I instantly remember how much fun we had in her class.   Can’t wait for her to come back so we can play with those “colors to dye for” again. (Remember I said dye underwear too!)
Thanks again, Frieda! 
Judy  Brentwood, TN
This was a fun, informative, inspiring workshop. Frieda was fun and added so much to the class.
Linda

I've tried dyeing fabric on my own with varied results. Frieda makes it easy to achieve stunning pieces with vivid colors.
Marcia

Frieda provided clear and organized instruction, and the encouragement to be creative.

You could have this much fun too! I teach my dying method at quilt guilds. If you belong to a guild and would like me to come there and teach this easy method, please contact your program chair person.
IMG_0204 IMG_0202 IMG_0203  IMG_0211  IMG_0213 IMG_0214 IMG_0215 IMG_0217

Saturday, January 29, 2011

Student work

0 comments

I always tell my students that if they send me pictures of their finished work I will post it on the blog.

Ruthie from Hot Springs Village AR sent these images.

I was only there two weeks ago. Way to go Ruthie!! Thanks for sending these.

They teach it at Stanford

3 comments

My sister just sent me this. I thought I would share.

Our ability to "chit-chat"  is good for our health......read on!

They Teach It at Stanford

"I just finished taking  an evening class at Stanford. The last lecture was on the mind-body connection - the relationship between stress and disease. The speaker (head  of psychiatry at Stanford) said, among other things, that one of the best things that a man could do for his health is to be married to a woman whereas for a  woman, one of the best things she could do for her health was to nurture her relationships with her girlfriends.
At first everyone laughed, but he was serious.

Women connect with each other differently and  provide support systems that help each other to deal with stress and difficult  life experiences. Physically this quality “girlfriend time" helps us to create more serotonin - a neurotransmitter that helps combat depression and can create a general feeling of well being.  Women share feelings whereas men often form relationships around activities. They rarely sit down with a buddy and talk about how they feel about certain things or how their personal lives are going. Jobs? Yes. Sports? Yes. Cars? Yes. Fishing, hunting, golf?
Yes.  But their feelings? Rarely.

Women do it all of the time. We share from our souls with our sisters/mothers, and evidently that is very good for our health.  He said that spending time with a friend is just as important to our general health as jogging or working out at a gym.

There's a tendency to think that when we are "exercising" we  are doing something good for our bodies, but when we are hanging out with friends, we are wasting our time and should be more productively engaged—not true. In fact, he said that failure to create and maintain quality personal relationships with other humans is as dangerous to our physical health as smoking!

So every time you hang out to schmooze with a gal pal, just pat yourself on the back and congratulate yourself for doing something good for your health! We are indeed very, very lucky. Sooooo let's toast to our friendship with our girlfriends. Evidently it's very good for our health."

Friday, January 28, 2011

Cleaning up

1 comments

Now that you have dyed all this great colorful fabric, how do you wash it out and dry it?

Aging the fabric

The fabric and dye need to sit and “age” at least two hours, but ideally up to 24 hours. The amount of time required depends on the temperature, which should be at least 70°F (21°C). I have found that if I am working outside on a sunny day and the temperature is above 70°F, I can lay the fabrics out on the grass to dry. By the time they are dry, the color is set.  Obviously not in the snow and cold that we are having right now.

The sodium carbonate and dye have bonded and exhausted themselves, and the excess dye can be washed away. Once the dye and the sodium carbonate have mixed, they begin to lose power. You can’t reuse the dye from your samples even though it looks like it is still very intense.

049

I like to wash out the light colors by themselves. However, if you stay right with the fabric and don’t walk away from the washing machine between wash cycles, you can load them all together. I treat my dyed fabric like I used to treat cloth diapers. I run them through a cold water rinse cycle first, then a hot wash cycle with laundry detergent, and finally a double rinse cycle. By then all the dye is washed away. Be sure to stay close so that none of the fabrics sit wet against each other as a transfer of un-reacted dark dye against a lighter dye area will occur. This is called “back wash.”

IMG_1006

You can add a Tablespoon or up to a 1/4 cup of Synthrapol to the wash cycle depending on how much fabric you are washing. Synthrapol is a textile detergent designed to remove grease and oils from silk and cottons, and it is also used as a pre-wash for commercial fabrics. It is designed to keep dye in suspension when washing out fabrics and helps to prevent the “Back wash” onto light colored areas. You can buy Sythrapol through the dye supply companies, and I have even seen it in stores that sell dyes and fabric.

Cleaning yourself.

There are products on the market to remove dye from your skin, but I have found the best way to get rid of dye on my hands and arms, and in many instances legs and face, is to use a scrubby sponge and a nail brush. This method basically removes a layer of derma, so I think of it as going to a beauty spa! In the tub or sink take the scrubby sponge to your body and pretend you are at an expensive spa resort where you are getting a mud scrub!!*

I hope you have enjoyed this mini lesson in dyeing fabric and are enthused to try it your self. I think you will find it very addictive. If you don’t already own my book it is a great resource and you should add it to your library. :) And remember if you order $30 or more on my website this month I am including free a packet of 48-5” cut dyed fabric squares. Such a deal. It ends January 31st!

001

Thursday, January 27, 2011

And the winner is…

1 comments

This weeks winner is Olga Shuessler from Centennieal CO

Here is my son Erik pulling the winning name out of the “hat”. Isn’t he cute!

IMG_0821

Olga will receive four quarter yards of Spring Special.   springspecial2

I hope you have fun with these Olga and please be sure and send us a picture of something you make out of them.

duluth

This is what it feels like outside today. Blue and cold, but bright. Duluth Trees.

friedas1-1

Wednesday, January 26, 2011

Dye painting

1 comments

Closely related to Stand and Pour is Dye Painting.  Use a thickener such as sodium alginate (derived from seaweed) to thicken the dye. To thicken the dye read the directions on the container. You can do lots of things with the thickened dye. Use a brush or squeeze bottle to apply the dye. By using different types of brushes to get different effects, like thin lines if you use a small brush and wide stripes of lines of you use a fat brush with bristles. You can apply the thickened dye first, then let it dry and then apply another unthickened color over it. Or, you can do just the opposite. Dye the fabric first with unthickened dye and let it dry, then apply thickened dye over it. Either way will give interesting results. This is a great way to add texture to your dyed fabric.

IMG_1438

There are many examples of famous people who use thickened dye to paint their quilts. You might try that too.

Tuesday, January 25, 2011

Open bidding on original fused art

1 comments


Batik Poppies©2009 16″ x 20″ (Fabric; Island Batiks and my hand dyes, machine quilted with Superior Rayon Thread) - Regular Price: $250. You pay ?

What Would you Pay for Batik Poppies?

I decided to sell some of my art work on a monthly basis via ebay.  A new monthly art sale.  It is easier to bid on ebay.

This month’s artwork is now up for auction here:

Bidding ends Tuesday evening, February 1st.

The Art – Batik Poppies.

 Each year the Poppies appear in my garden. I have a mix of red, orange and melon colors. They are spectacular to see. I am always cheered by their appearance and have made many versions of them in my art work.

After a long hard winter it is such a breath of fresh air to have blue skies, green grass and blooming flowers.

I think it is one of the perks for living through the winter – brilliant spring flowers.

poppiebatik

This quilt was featured in Quilt Magazine April/May 2009

Monday, January 24, 2011

Other ways to apply dye to the fabric.

2 comments

We have one more give away this week and then the final give away - a copy of my book on January 31. I hope you are enjoying all this talk about dyeing fabric.

Things to keep in mind and have and when dyeing in this manner:

1. Best to do this outside on a sunny day, if possible

2. Have a hose available to rinse the platters

3. Have Styrofam platters covered in plastic

4. 12 squirt bottles

5. Several yards of fabric pre-soaked in sodium carbonate water and wrung out in your washing machine on spin and set aside in a plastic wash tub.

043 I mix up my dyes and then make my gradations in each of the separate squirt bottles. You can use any of the gradations you like or all of them if you have enough squirt bottles. I suggest you try one 12 step gradation at a time. I like to label all my squirt bottles so I know what color is in each one. It is hard to tell the color just by looking at the bottle. I just use numbers 1-12, but you can also put the name of the color for instance- Yellow/orange - on the bottle if you like that better. Refer to the dye chart or your color wheel. These will rub off over time, but just remark them. Then I begin to play.

Adding resists

After you have applied the color, you can lay things on top of the dyed fabric to act as a resist in the sun. Try all kinds of objects. Here is a list of things to start with:

  • Rice or heavy grains
  • Rock salt or DekaSILK salt (see Resources, page XX)
  • Rocks of all sizes
  • Coins of all sizes
  • Washers and nuts and bolts from the hardware store
  • Any flat or heavy found objects
  • Scissors
  • Pliers
  • Glasses
  • Bottles
  • Marbles
  • 045 045a

Anything that will lay flat and has some weight to it can be tried as a resist. Rummage around the house to find stuff and give it a try. You can also use rock salt or DekaSILK salt on top of the wet fabric. Once you place the salt on the wet fabric, squirt it with water to get all the salt wet, then let it dry. The salt will act as a resist and send the color shooting out like stars.

Method 2: Stand and pour

Another method to try with these light weight platters is to drip the dye down the length of the fabric. This is referred to as “Stand and Pour,” or drip dyeing. [Place a length of presoaked wrung out fabric on the platter. Lean the platter up against something so that it stands at an 85 degree angle. Start at the top end of the fabric and, using your squirt bottles with dye color in them, squirt dye on the fabric. The dye will drip and blend down to the bottom of the fabric. You will get some wonderful landscape and sky looking fabrics using this method. If you do this inside, place the platter inside a larger plastic container to catch the dripped dye. It is also advisable to place a piece of fabric in the bottom of this container to catch the excess dye. This makes another type of mystery fabric.

047 048

I’ll bet you can hardly wait for summer to try some of these.

You can get all this information and more in my book Fabric to Dye For.

Saturday, January 22, 2011

Sewing with Nancy

1 comments

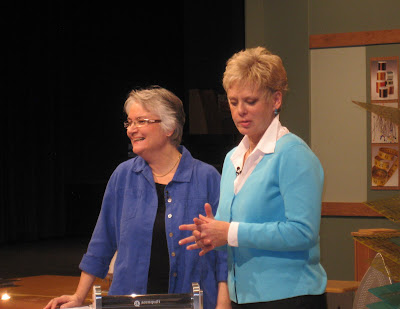
Yesterday Laura and I filmed two new episodes of "Sewing with Nancy"
Vicki the magnificent make up artist is making us look "good". Laura is getting the royal treatment. Vicki recently worked on the film "Public Enemy" with Johnny Depp. We are in good company.
The taping process is always fun with Nancy. She IS the nicest person in the quilting, sewing industry. We also love her crew, Donna, Laurie and Deanna, who had to stay home and mind the office.
It's a tough job but somebody has to do it.
Posted by Picasa

Winter in the woods

0 comments
George and I go out almost every day that I am home. But the temperatures these days is bitter, below zero.
BUT the woods still hold lots of interesting smells and thinks to explore.

Lovely design and color combination.
Posted by Picasa

Friday, January 21, 2011

Dyeing fabric flat

0 comments

I also like to dye my fabrics flat on a surface. The way that I do that is to use a large platter. I use plexi glass platters since I dye a little everyday. That’s right folks I dye a little every day just for you :)

But a cheaper and easier way to make a platter is to use styro foam platters. You can buy styro foam insulation at any large building home supply store like Menards or Home Depot. They come in 4’ x 8’ sheets and cost under $10. I have the store cut them into three pieces for me. I have them cut it in half and then one of the halves cut in half.

039 040 I wrap them in heavy plastic and tape them with a water proof tape. This way I can reuse them and rinse them off very easily.

I usually do this kind of dyeing outside and in the summer time.


044041

I have raised up my table with pvc pipe so that I am not bending over all the time. I have mixed my dyes and put them into smaller squirt bottles. Then after I have soaked the fabric I can lay it out on my platter and apply the dye free form. This is a great way to work. You can stack up multiple layers of fabric and get many yards this way. I also will put up to four yards of fabric on these platters and pleat them and then apply the dye from the squirt bottles.

purpleconeflower-1 The yellow background fabric in my pattern purple coneflowers has been dyed this way. I used three different colors of yellow and a little lime green to get this background.

IMG_2126

Dyeing outside in the summer time is one of George’s favorite activities.

Thursday, January 20, 2011

And the winner is -

1 comments
This weeks winner is Sylvia Schaefer from Athens GA
I am in Madison WI filming two new episodes for Sewing with Nancy with Nancy Zieman and my friend Laura Wasilowski.
Nancy was gracious enough to pull the name out of the hat.

I forgot to take a picture of Nancy pulling the name so I had to substitute this picture I took a couple of years ago at the Sewing with Nancy Quilt show.
Sylvia will receive four fat quarters of a turquoise step down gradation. Congratulations!!
I hope you have fun with these.
friedaanderson4step

Wednesday, January 19, 2011

Dying from one color to another another color

2 comments

When I am dying fabrics for myself my favorite way to dye is from one color to another. This means picking two colors that I love and grading from one to the next by stepping down from the full color in one cup to the full color in the last cup. For instance;

082

This is a gradation from orange (1/2red 1/2yellow) to blue. Starting with a full cup of orange I dye the first gradation. The next gradation is 1 cup of orange with a Tablespoon of blue. The third gradation is 3/4 cup of orange with a 1/4 cup of blue and so on until I reach a full cup of blue.

What happens with these kinds of gradations is you get some fabulous in between colors. My favorite brown is 4/5 orange to 3/5 blue. This makes a rich chocolaty brown color.

When I start to experiment with different color combinations it is very important to keep a notebook. You think you will remember what you have done, but you won’t! My notebook is all stained from writing in it with my wet hands, but it is well worth it.

IMG_0982

grad-alimeyavacado Limey Avocado is a gradation in greens.

fabric These fabrics grade from purple to green and from yellow to blue.

This is the quilt that I made with these gradations.

Winter Forest

fanderson_full_winter

The trees are also a gradation I have sliced apart Rainbow strip gradation to achieve the changes in color for the limbs on the trees.

Tuesday, January 18, 2011

1/11/11

6 comments

Simple interesting Fact

To:

This year we will experience 4 unusual dates.... 1/1/11, 1/11/11, 11/1/11, 11/11/11 .... NOW go figure this out.... take the last 2 digits of the year you were born plus the age you will be this year and it WILL EQUAL TO 111.

Monday, January 17, 2011

Gradations from light to dark

0 comments
I think we all love to see fabrics that gradate from light to dark in one color.
Some of the first hand dyed fabrics that I was attracted to and ultimately bought where the ones that gradated in one color from dark to light.
IMG_1428
Cerulean Blue, Blackened Yellow (yellow with black added to it), Fuchsia
Here are three such gradations.
Once you mix up your color you can do an easy step down in color gradation. Starting with one cup of pure color. Next pour 3/4 cup of pure color and 1/4 cup of water.
Continue to step down the amount of dye with water added to your 1 cup measure to achieve as subtle of a gradation as you like. The ones you see here are a 7 step gradation.
IMG_0467 Baby quilt
I used three different graded colors to make this baby quilt. A gradation in green, turquoise and yellow.

Every Wednesday this month I will have a drawing to give away a stack of color gradations made from the directions in my book. Then on Thursday some lucky winner will be mailed their four fat quarters of hand dyed fabric. Send me an email with your name and address, and I will add you to the hat for a chance to win. At the end of the month, I will pull one lucky winner from among all the names that I have collected in the hat who will receive a free copy of my book.  And if you look on my website this month all orders over $30 will receive a free 48-5” packet of precut hand dyed fabric squares. What at deal.

Print this page