Yesterday I posted about my quilts of George. And Chay asked me if I had photos of the process. Well no I don’t. I made that quilt YEARS ago. But I can tell you sorta how I made the image and then the process of making the quilt.
I opened a picture of George that I really liked, that had a full face image of him in Photoshop.
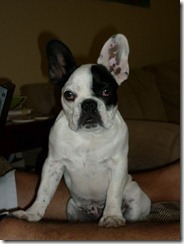
Here is a picture of my son’s dog Wrigley, an adorable french bull dog that I will use instead.
She was the love of my son and daughter in laws life until Micah their son arrived. Such is life.
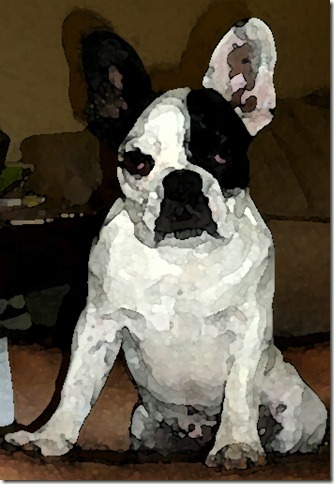
I opened up this picture in Photoshop. I selected from the toolbar the effects button and then choose the artist effect. There are multiple chooses in this button and I just played around with each one until I found the effect that I thought would work well. In the current program it will let you play around with all different kinds of filters on the picture and see what it will look like before you choose which one you like. The one above was created with the watercolor effect.
I saved the new file with a new name. I wanted the image to be a certain size, so in the image dialog box I changed the dimensions of the picture and saved it again to about 12-14” square.
I wanted to print the image to the new size. Once I opened the print dialog box I had to find in my print options area a place to let me tile the image. On my current printer it is in the print settings dialog box under page layout. I choose poster printing. This will allow the image to print the size that you want to work with. It will tile the image onto how ever many pages it takes to make it the size you have indicated.
Once I had the image printed out in tiled pages, I could then tape it back together to form the larger image to work off of. This is a trick I use often to blow up smaller images that I have drawn or pictures that I have taken. I can then use a black sharpie marker to outline each individual shape that I want to make. I place a piece of release paper from the fused fabric over the image and trace on the release paper the shape I want to cut out. I will then place the traced side of the shape against the fused side of my fabric and press with a hot dry iron to transfer the shape to the back of the fused fabric. I let this cool and then cut out my shape.
Once I have all the shapes cut out, I can lay a piece of release paper over the original image and reassemble my fused design. When I cut out the individual shapes I make sure that I leave a bit of overlap where ever pieces are going to layer on on top of or underneath each other.
In the case of Georgie Porky I used four to five shades of hand dyed turquoise cotton sateen and white cotton fabrics to create George’s face. Once I finished the face and started auditioning it on background fabrics I realized it needed a shadow line around the face outline. I placed a dark purple shadow fabric underneath the face to give it more depth, and cut it out about an 1/8” of an inch larger.
I fused it to the background fabric and cut that background out with a pinking decorative blade in my rotary cutter. If you keep your decorative blades in their own handle you will use them more often.
From there I started auditioning it on border fabric. The border fabric is a piece of silk multi colored Carmeuse.


No comments:
Post a Comment